Add a custom field
When you need to track something DealJourney has no field for (a project number, a region, a contract type of your own), add a custom field.
- 1Open Admin from the sidebar.
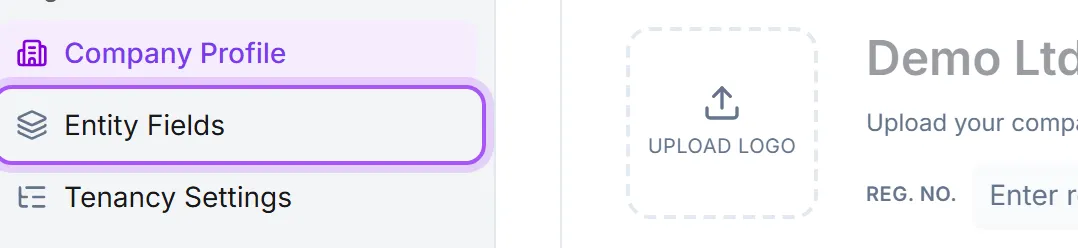
- 2Go to Entity Fields under Organization.
- 3Choose the record type the field belongs to: customers, contacts, leads, opportunities, or subscriptions.
- 4Add the field, give it a label people will understand, and choose the right type.
- 5Save.
Pick the type carefully: it is the decision that matters most. A date stored as text cannot be filtered as "before last month". A number stored as text sorts 10 before 9. A fixed set of options stored as free text ends up with four spellings of the same word and no reliable filter. Use a date for dates, a number or currency for amounts, a yes/no for flags, and a dropdown whenever the answer comes from a known list.
Longer text: plain or formatted. For a few sentences with no formatting, use a long text field. When the text needs structure (bold, bullet lists, links), choose Rich text: Formatted text with bold, lists and links. Click the value on a record to edit it with the same editor you write notes with, then Save. Text that was imported without formatting keeps its line breaks. Filters, list columns and exports use the words only, never the formatting. A rich text field can also be placed on a custom tab or on an activity, and edited there. Put fields and groups on a tab
Web addresses open in one click. A URL field shows its address as a link in list columns and on the record. Clicking the address opens the page in a new tab; use the pencil beside it to edit. An address typed without https:// opens fine as well. Imported text fields containing a complete https:// or www. address also open as links; ordinary text stays text.
A custom field holds one value. When people should add dated entries over time (a running history of calls or visits), write notes on the record's timeline instead: every note there keeps who wrote it and when.
Edit dropdown choices from a record. Administrators can use Edit Options below an editable dropdown's choices. It stays visible while the choices scroll, including on long lead-source lists. After renaming a choice, use Save Options to apply it. The new wording carries through existing records, including multiple-choice fields, and the saved filters, automation conditions and dependent choices that refer to it. The change applies only to your workspace. If the save fails, the choices and records keep their previous values. Removing a choice from the the choices and records keep their previous values. Removing a choice from the list leaves previously saved values in place; use a rename to change those values.
Give a choice its own colour. Every choice is shown as a coloured chip in lists, on record pages and in the picker itself. By default the colour is worked out from the wording, which is fine until a choice that means something bad happens to come out green. Click the round swatch to the left of a choice in the field's options and pick a colour, or choose the automatic colour to hand it back. Colours you set are used everywhere that choice appears, they apply to your workspace only, and choices you never touch look exactly as they do today. Rename a choice and it keeps the colour you gave it.
The order in the list is the order people read the fields in. Sort the list by Order and drag a row by the handle on its left to move it. The new order saves as soon as you drop the row, and it applies everywhere that record type is shown. Dragging is only offered while the list is in that order and no search is active, because dropping a row into a name-sorted or filtered list would put it somewhere you did not point at.
Once created, the field shows on that record type for everyone, and it becomes available as a filter condition and as a column on the list page. That is the real payoff: a custom field is what lets you later ask for every opportunity on one project, or every customer in one region.
Keeping two dropdowns in step. Field dependencies lets one choice field decide what another one may offer: Link two dropdown fields so they stay in step. Either limit what one of them offers based on the other, or have one filled in automatically from the other. Pick the allowed options for each value of the controlling field, and the rest disappear from the picker on the record. Once a value has been decided, the panel shows only the options it allows — Change ({{count}} more) brings the rest back when you want to change the set. A rule over twenty options and five brands is otherwise a hundred checkboxes with the answer buried inside it.
The same restrictions apply in the record sidebar and in custom tabs, including radio buttons and checkboxes. Changing the controlling value immediately updates the choices. The controlling field always wins: a saved value the new choice no longer allows is cleared as the record saves, and the field is marked as needing a new one, so changing the controlling field is never refused. If the rule requires a choice, the record asks for one before the next change to it saves. Values with no mapping remain unrestricted, which is worth checking when a rule looks inactive; explicitly select an empty set to allow no options for a value.
Finding a record by a number in one of your fields. When a field holds an identifier people look records up by (a serial number, a P-number, a firm id), open the field's edit dialog and turn on Searchable. From then on, typing the whole value into the search at the top of the page, or into the list's own search box, finds the record, whatever the record is called. It works on text, number, email, phone and link fields on customers and custom objects. The match is on the complete value, ignoring upper and lower case and spaces, dots or dashes typed in between, and only for a value with at least one digit in it: part of a serial number finds nothing. CVR, organisation number and P-number need no setting; they are always searchable.
Filling in the same value every time. When a new record nearly always gets the same value (a deadline of today, a type of phone call), open the field's edit dialog and set New records start with. A date field can start on Today or A number of days from today; a dropdown can start on any of its choices. This works on the fields DealJourney ships as well as your own. Whoever creates the record sees the value already filled in and can still change it before saving. Records that already exist are not touched. Today it applies to every field when creating an activity, and to your own fields when creating a quote; customers and contacts do not use it yet.
Taking a field away: hide it, or delete it. These are not the same thing and only one of them is reversible.
- Hide is the Visible switch on the field's row. It flips to Hidden, the field disappears from forms and record pages, and everything already stored stays exactly where it is. Switch it back on and the values are all still there. This is what you want almost every time, and it is the only option on the fields DealJourney ships (those can be hidden but never deleted). Required fields cannot be hidden, so clear the required setting first if you need to hide one.
- Delete removes the field you created, for good. The field, its label overrides and any dropdown-dependency rule that mentions it all go. What it does NOT do is clear the values already saved on your records: they stay in the database with nothing left to display them, and creating a new field with the same name later will not bring them back into view.
Before you confirm a delete, the dialog tells you how many records still hold a value for that field. If it cannot work that out it says so rather than guessing, and you should treat that as "there is probably data here".
Adding a new kind of thing (cars, contracts, properties) is not a custom field. That is a custom entity, which gets its own page and its own records, under Custom Entities.
Was this helpful?